Monday, October 16, 2006

Wheel house continued.....


Well, some more progress this past weekend, not as much as should have been for two reasons.. 1) My enthusiasm for the build is starting to wane, and

2)The weather was so fine, I took advantage and gave my shed /workshop a coat of Cuprinol, to prepare her for the winter season.

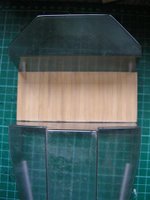
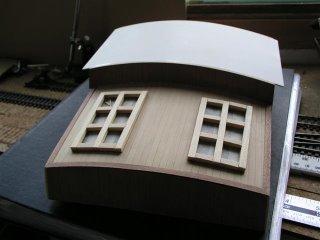
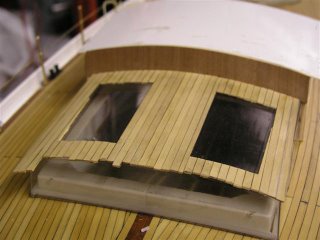
Anyway, I continued for many hours on this wheelhouse effort.. and effort is what it is.. It is again clad in these awful veneers and trimmed with spruce.. as is usual ( like Frank says) " I did it my way" and here is the result. I used all my remaining stock of mahogany planks, trim and lemon strips..

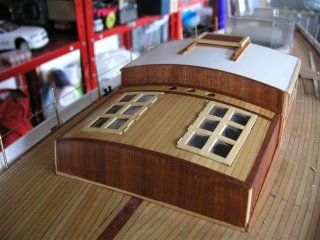
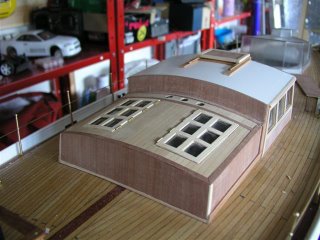
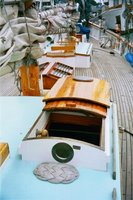
I made a decision early on to refit all the roof material in white, as I feel it contrasts nicely with the timber /veneers used.

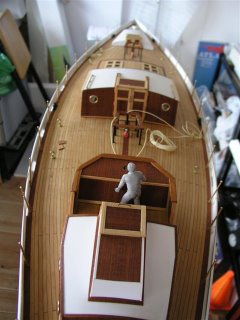
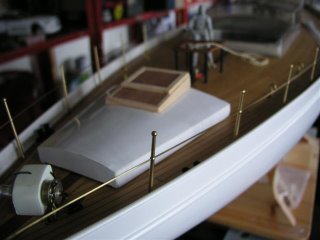
The following is the stern view, showing all 3 cabins with white roof material.

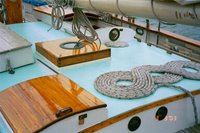
The brass portholes are now fitted in situ.. I was worried about this, given that one has to drill through this veneer stuff. I found a 14mm flat woodwork bit to be the nearest suitable size, then finish with a round file or a dowel and glasspaper.


Steve

Monday, October 09, 2006

Wheelhouse / Steering Area

Whilst waiting for the tung oil to dry on the other 2 cabins, I made a start on the aft wheelhouse section.

Again, I really, do not care for the supplied Robbe stripey veneer, so have planked the captains steering area with the last remains I have of the Lemonwood Gerona planking. Again, I think its an improvement.. though, this is obviously a personal taste thing.

The veneer quality on this sheet seems a little better, no split parts or de-laminations yet !


Similarly the aft roof "stripey "material has been replaced with white plasti-card, that will be finished with Honduran Mahogany trim planks.


I feel much happier with this part of the build, I think the white roof area will contrast nicely with the rest of the fine timbers used.

Sunday, October 08, 2006

After Sanding add a Little Tung Oil


This is how the cabin looks after a first coat of 50% Tung Oil, and 50% thinners... the way this stuff works on fine timbers is simply stunning.

Thanks to Keith Jewell for showing me the way on this, this has to be the best finish for timber.. there is NO varnish on my vessel AT ALL !!


The depth, and warmth of grain will improve further, as more coats of Tung Oil are added.. as I found on my deck.

Steve

More Centre Cabin !


Okay,
I gave all modelling a miss yesterday.. as I clearly got too annoyed and frustrated with this part of the build. When situations arise like this, its better to walk away...

Now I am pleased to say, the break, allowed me to re-visit the Atlantis, and rectify the parts I wasn't happy with.

I have spent around 6 hours on that centre cabin today, and am now much happier with the result.. so I feel I am back on track.

This, said, I am disappointed, in the quality of the woods supplied in this kit, overall..

Thanks to some left overs of Lemonwood Gerona, and Honduran Mahogany, ( from our Keith Jewell of Modelling Timbers) I have re-built some parts, eliminating that horrible cheap spruce stuff , that I do not like. Sadly, I am stuck with the yukky veneers in some parts of the build.

Anyway, this is the result of my labour today, after sanding.


The above are after sanding and PRIOR to the magic of Tung Oil... :)

Steve

Friday, October 06, 2006

Centre Cabin continued...

Lemonwood now laid, and sanded, several back several times.. Robbe kit instructions show her trimmed with spruce strips, that are sanded back really hard, to a fraction of their original thickness.

As a trial, I have not done this, instead have trimmed the edges with thin mahogany strips.

Looked nice at this stage... So made a start on the 2 skylights.. Robbe supply a thin diecut ply template, to which one adds spruce strips, which are cut to size and glued.

The spruce, is much much too thick.. as you can see .

Mega sanding required to get these skylights down to a sensible level. This is after sanding... but still virgin wood, not yet oiled or treated.. and there are brass portholes and a roof hatch , yet to be added... so tis a long way from finished.


Looks okay from this view, but the sides are awful.

I have tried to cover up the splintering veneer with trim strips, and it hasnt been very succesful.. I am too emabarrased to display the side photos !

So likely I shall rip the sides off and start again.

Watch this space... Steve

Centre Cabin

Work has started on the Centre main cabin..

This is the basic, structure, a vac moulding that requires trimming to the deck camber, the kit supplies the white abs roof which is contact glued in position


After a weeks work on this, I am not totally happy with the result..

The veneers really are difficult to work... very brittle and despite careful handling, any cutting or sanding to the edges and the veneer splinters..

I have come close to abandoning the project.. with frustration..

I think I need to take a break from it... &.. revisit with fresh eyes... The finish hides a multitude of sins, that I may or may not be happy with.. time will tell. there is chance it may be ripped off and re-started.. dunno yet But a break is whats needed, I am sure.

I am not a "woody modeller".. I think I lack the patience to get the finish I'd like. I admit, I do have difficulty working with wood, I much prefer plastic.. which I can work more easily and "repair" too...

Here is the progress thus far... it could change & be back to the drawing board..

Essentially, the moulding is "cladded" with various veneer parts and spruce strips that are cut to size, and then require extensive sanding ! As previously stated , I don't much care for the supplied "Stripey" veneer.

So I made the decision to use some of my spare Lemonwood Gerona, ( from Keith Jewell), this is the main timber on deck.Here they are, roughly cut and laid in position.

Sunday, October 01, 2006

My version of forward cabin


Okay,

Cladded with Plasticard, with smaller parts added , still using the kit supplied veneers and spruce for the doors and hatches.

I still have a lot more work to do, filling, sanding, painting, detailing, etc but you get the picture ?


I feel the white will contrast nicely, with the rest of the colour scheme..

More to follow soon !

Steve

Cabins

Work has started on the 3 superstructure elements.
Starting with the fore cabin.. The magnet spacer parts are fitted.. these are the "attractors" to the powerful magnet already fitted into the forward hatch cover. Very clever, and works a treat.

Hmm .. the veneer for the roofing , now supplied in Robbe Atlantis kits , is I am afraid, not to my liking.. I much prefer the original Tiama plank version. The later kits, ( like mine) has a striped veneer.. that , personally I don' t care for.

I have been thinking of alternatives.. and decided on one of two.. either full planking with Lemonwood, or using plasticard , as the centre cabin does in the kit.

I did in fact plank fully with lemonwood.. but after a nights sleep, I decided I didn't like it..

So following a prototype schooner... ( not the Atlantis as its semi scale) I have decided to use plasticard.

Why ? 2 reasons..

Firstly, the veneers , are very, very fragile.. just handling them can cause the veneer to part with the ply, or chip when cutting or sanding.. and looks awful.

Secondly, I have decided, my Robbe Atlantis will NOT be like a regular kit built Atlantis.. I shall complete the build , to my spec, and my liking .. !

Well, it is MY Model :)

Loosely, and only cosmetically my Atlantis is inspired by this , Dirigo II