Servo, Keel and Sealant
I always find silicone sealant to be a rather smelly /noxious substance, ( evidently, rumour has it also, that the fumes in a confined space, can affect the r/c gear ? ) dunno, may be just a rumour ?
So I sought out an alternative, the local Homebase store sells a water based polymer sealant, does the same job, but with hardly any pong ! A little more expensive but suits me Sir :)

The instructions now tell me to add sealant to the hulls internal keel fin, add the keel weight and push it as far aft as it will go then seal the edges with sealant.
I have done this.. and boy is the hull HEAVY !!!
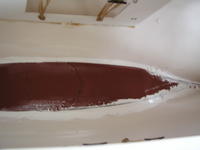
In hind sight, I may have delayed this install, as the hull has not yet been painted !
Then again, the deck needs planking before the transom is fitted, etc etc, so I just followed the instructions !
I wont be able to invert the hull to paint it until the sealant has set, approx 48 - 72 hours !
So my thoughts are now turning to a colour scheme for the hull !
All go innit ! :)
Next day delivery of the new rudder servo has allowed me to complete that section of the build.
Excellent service from Howes Models as usual.
I found the servo part to which it fits 7.13 hasn't had the rudder post hole drilled yet. On checking the plans, it seems to have been omitted by Robbe, anyway a 5.5 mm drill bit is required for a nice tight fit over the rudder post.
Make sure you rotate the rudder post /tube when applying the Stabilit, make sure the hole is sealed !

You will need to ensure the support parts are also trimmed to butt up to the post, before using stabilit to secure. I found the 2 side gussets angle, needed trimming before fitting. To glue these parts, I used Stabilit, as I feel it gives a stronger bond than the cyano Robbe suggest.
Note whenever using Stabilit, do ensure you use glass paper to roughen up the glueing surfaces !
posted by Busybeas @ 8:38 PM
![]()

<< Home