Further support (stage 8 )

My sincere thanks to my American pal, Taylor Sparks for this next advice...
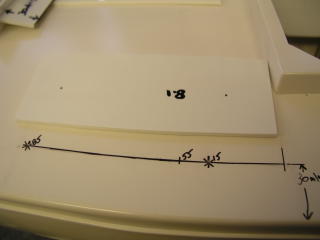
Stage 8 of the instructions tell us how to prepare & install the 4 deck /shroud support pieces, using a mirror and somehow marking the internals of the hull, before gluing them in position !
After a few attempts at trying to use a mirror to mark simply the internal marks, I gave up !
I asked my Atlantis "Guru" Taylor for advice...... as usual, he imparted some very useful advice, that proved a much easier solution than Robbe's instructions !!
As he said to me:
Jump ahead to stage 10 ( even though the planking of stage 9 hasn't been completed), go ahead, measure and drill the 8 deck holes for the mast stays /shrouds.
Take part 8.1 centre it correctly on TOP of the deck,over the holes,mark through the holes from underneath , below deck .
Afterwards, flip it over, place 8.1 UNDER the deck and "spot"(view) the markings through the drilled holes from above.
I did this and its much simpler than doin it the"Robbe way" :)
Remember, there are 4 pieces of 8.1 !
Roughen up the 8.1 pieces,(don't rub off the markings !) and similarly under the deck, this will give a key for the adhesive to hold onto.
Again, add Stabilit to the part, place into position, spot those dots thro the drilled holes and patiently hold in situ, till the glue bonds !
Unless you have Octopus arms only mix up enough resin to stick one at a time !

<< Home